Testing a motherboard is fundamental to guarantee that the framework is running accurately. However, assuming that you are a beginner, then you want to know how to test a motherboard.
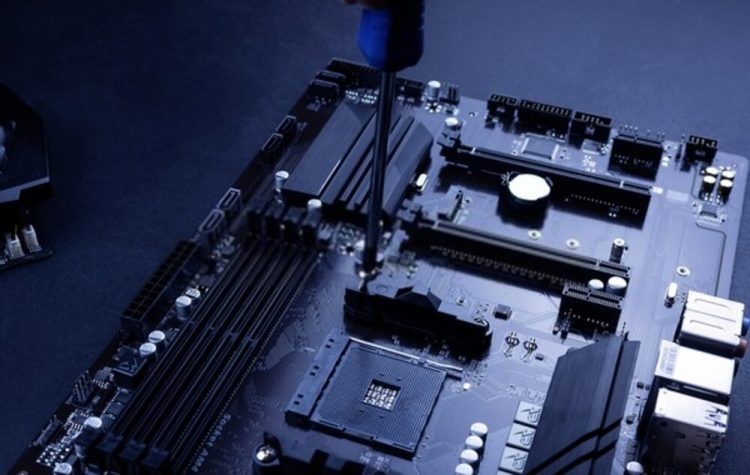
A motherboard holds a large number of the vital parts of the framework, like the central processing unit (CPU), memory, as well as regulator centre.
In light of its significance, it is vital to test a motherboard prior to utilizing it on a computer. You can perform different tests, which is dependent upon the manifestations you are encountering with the motherboard.
In the event that the motherboard is viewed as faulty, then you really want to supplant it at the earliest opportunity. So, This guide will direct you on how to test a motherboard.
Things to consider before installing a Motherboard
Basically, Motherboards are a fundamental piece of any PC or computer framework. They go about as the establishment for the remainder of the computer. Additionally, It is very essential to know how to test a motherboard prior to introducing it.
Check BIOS:
In general, the BIOS is the product that controls the motherboard. At the point when the computer turns on, you can really look at the BIOS by squeezing a particular key on the console. It will raise the BIOS screen surely.
Check ports:
The ports are the place where the various pieces of the computer are associated with the motherboard. So, you can simply test the ports by connecting various gadgets and checking whether they work.
Check memory:
The following stage is to actually take a look at the memory. When you introduce the memory, then you should interface the power supply to the motherboard too. Whenever everything is associated, then you must turn on the framework and check whether the memory is distinguished.
Check video card:
To check the graphics card, you should introduce it on the motherboard. When you introduce the video card, then you should interface the power supply to the motherboard as well.
Check hard disk drive:
The last advance is to really look at the hard disk drive. Presently, you should introduce it on the motherboard and afterwards, you should interface the power supply to the motherboard too. Whenever everything is associated, then simply turn on the framework and check whether the hard drive is recognized, then, at that point, it is all set, which is quite good.
Test a motherboard using a multimeter
A multimeter is a gadget that can test the voltage, current as well as the difficulty of a motherboard too. This segment will tell you the best way to test a motherboard with a multimeter bit by bit.
- Above all else, you should interface the multimeter tests to the motherboard. Interface the dark test to the ground and the red test to the voltage terminal respectively.
- Then, at that point, you must turn on the multimeter and select the “voltage” setting. Moreover, the multimeter should now gauge the voltage of the motherboard.
- You should detach the voltage test and interface the ammeter test to test the current as well. However, interface the ammeter test to the ground and the current terminal too.
- Then, turn on the multimeter and select the “amperage” setting. The multimeter should now gauge the current of the motherboard.
- To test the difficulty of the motherboard, you should detach the ammeter test and interface the opposition test too. Interface the difficulty test and the opposition terminal to the ground.
- At last, turn on the multimeter and select the “difficulty” setting. So, the multimeter should now gauge the opposition of the motherboard.
Test a motherboard using testing software
A motherboard test is a cycle that tests the usefulness of a motherboard. You can do it utilizing motherboard test programming or a motherboard analyzer.
- Close down the computer and undo all power strings.
- Presently you really want to open the computer case and eliminate the motherboard too.
- Introduce the motherboard testing programming.
- Interface the power ropes and turn on the computer.
- Run the motherboard testing programming too.
- Simply contrast the outcomes and the motherboard’s details as well.
- If the motherboard bombs the test, then supplant it.
Test a motherboard without a processor
Testing a motherboard without a processor is an interaction that can assist you with deciding whether a motherboard is damaged or not. To test a motherboard without a processor, you want a motherboard, a power supply, as well a memory module.
Here you can figure out how to test a motherboard without a processor:
- In the first place, you must ensure that the motherboard is appropriately situated in the suspension.
- Then, interface the power supply to the motherboard and the fans to the power supply as well.
- Then, at that point, you must associate the memory module to the motherboard.
- At long last, turn on the PC or computer.
If the motherboard is faulty, then the computer won’t begin. On the off chance that the motherboard is working accurately, the computer will begin, and you can get to the BIOS.
Read more: Clean motherboard using rubbing alcohol and compressed air
Lucas Noah, armed with a Bachelor’s degree in Information & Technology, stands as a prominent figure in the realm of tech journalism. Currently holding the position of Senior Admin, Lucas contributes his expertise to two esteemed companies: OceanaExpress LLC and CreativeOutrank LLC. His... Read more