
Do you want to know the Ways to Fix Critical Process Died Error in Windows 11? Read this article until the end.
Windows errors can occur at any time, especially during such Windows update. Among several such errors, the “Critical Process Died error” is one that many people are bothered by (also known as Blue Screen of Death).
Corrupted drivers, failed system updates, & memory problems are among the most common causes of the ‘critical process died’ error in Windows 11. We’ve provided a few troubleshooting tips which should help put an end to such frequent crashes. So, let’s take a look at them. You can always opt for a good PC repair service if you need additional help.
Fix Critical Process Died Error in Windows 11 cont’d
1. START THE COMPUTER IN SAFE MODE
If you can restart your computer ordinarily after the BSoD error, you can skip this step. If Windows fails to boot, you may receive the ‘critical process died’ error. So that you can try booting into Safe Mode to look into this further and troubleshoot the problem.
1: While your computer is booting, press & hold the physical power button for several seconds, or until it restarts. If you interrupt the boot process 3 times in a row, Windows will display the startup repair screen. Choose Advanced options from this menu.

2: After that, select Troubleshoot.

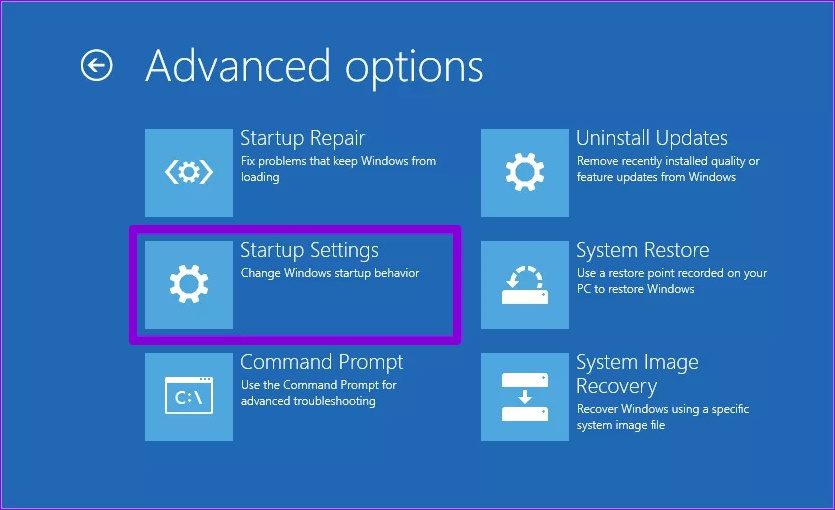
3: Next, select Advanced Options.

4: Select Startup Settings from the Advanced Options menu.
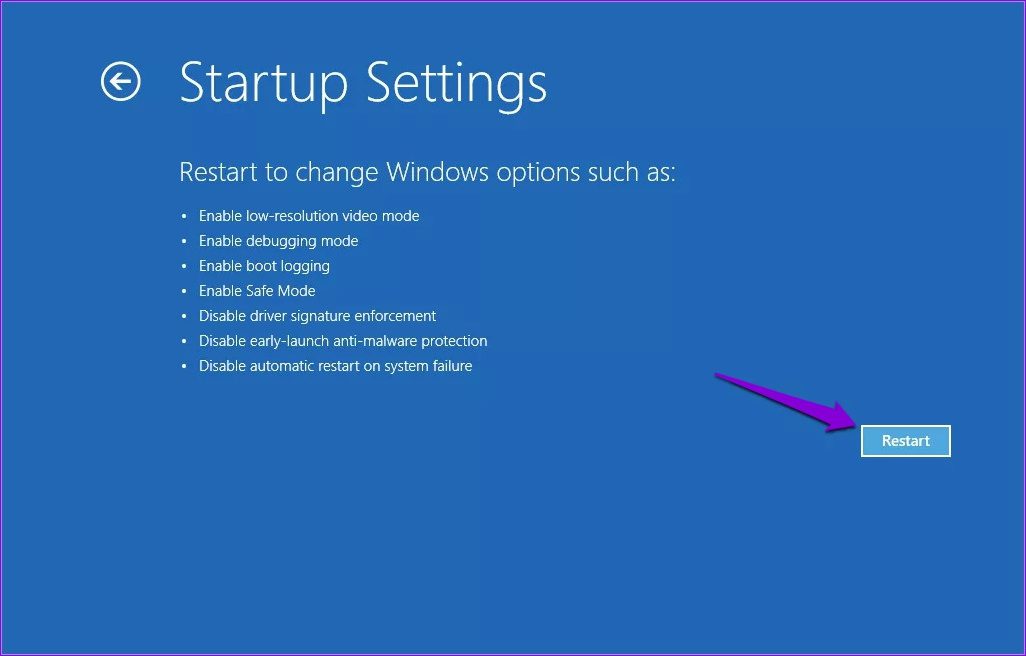
5: To access the Startup Settings menu, click the Restart button.
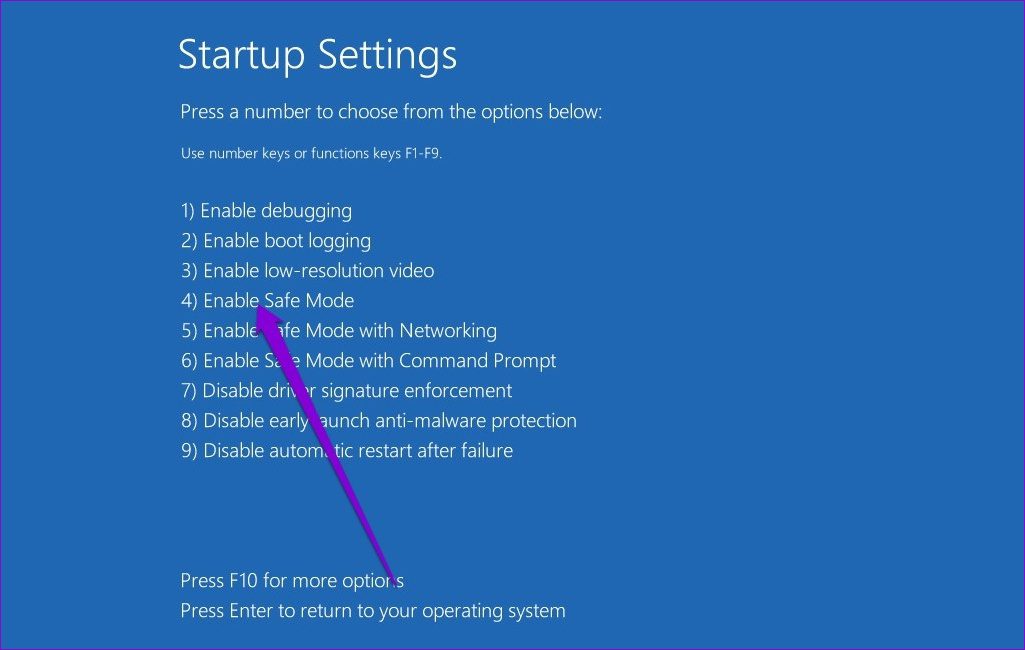
6: Finally, on your keyboard, press 4 or F4 to restart your computer in Safe Mode.
Use the methods listed below to troubleshoot the error after booting into Safe Mode.
2. USE THE TROUBLESHOOTER
In such cases, Windows 11 includes a number of troubleshooters which can be useful. You can try running those troubleshooters to see if it makes a difference.
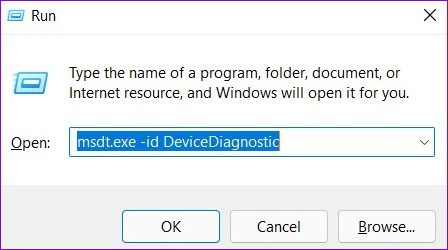
Begin by running the hardware troubleshooter. To open the Run command, press Windows key + R, then type
msdt.exe -id DeviceDiagnostic & press Enter.
Then click Next to start the process.

If the problem continues, you can use other Windows troubleshooters.
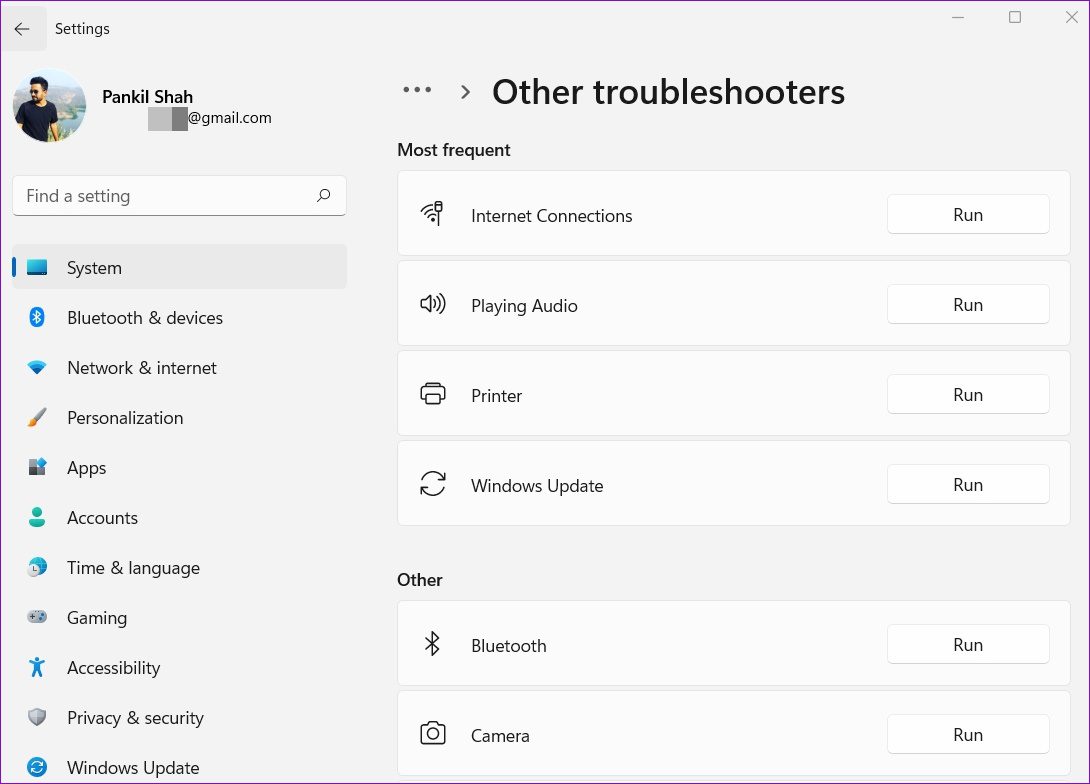
1: Click the Start button, then type troubleshoot settings and press Enter.

2: Navigate to the Other Troubleshooters section.

3: A list of troubleshooters is available. Run any relevant troubleshooters that may be useful in this situation.
Check to see if the error has been resolved by restarting your computer.
3. PERFORM SFC AND DISM SCAN
Corrupted or missing system files can also cause problems for Windows processes, resulting in the ‘critical process died’ error. SFC (System File Checker) can be used to replace those system files with their cached versions.
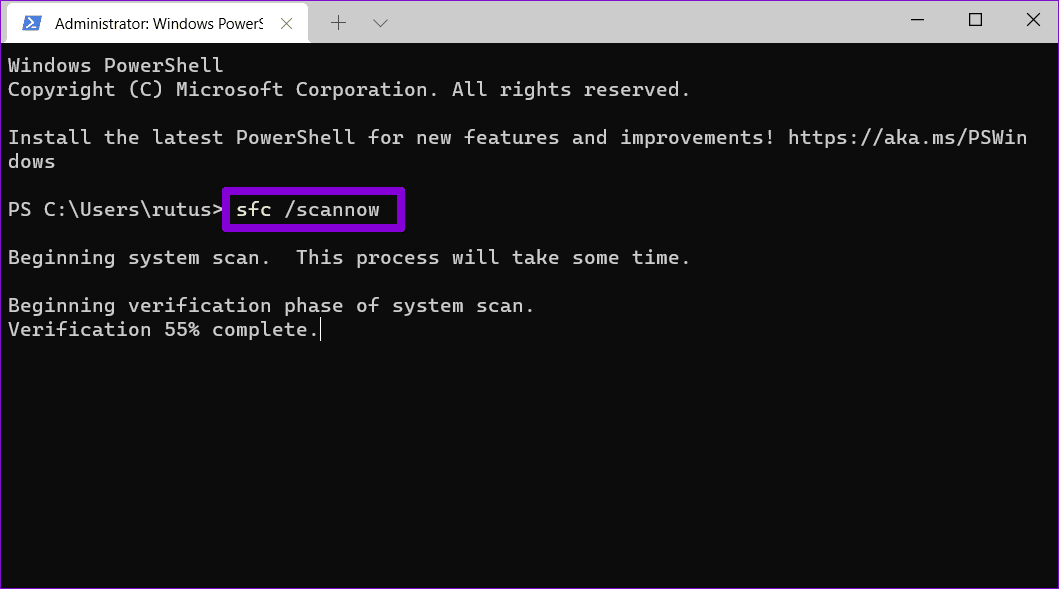
1: Right-click on the Start menu option and select Windows Terminal from the resulting menu (Admin).

2: Press Enter following type the command mentioned below .
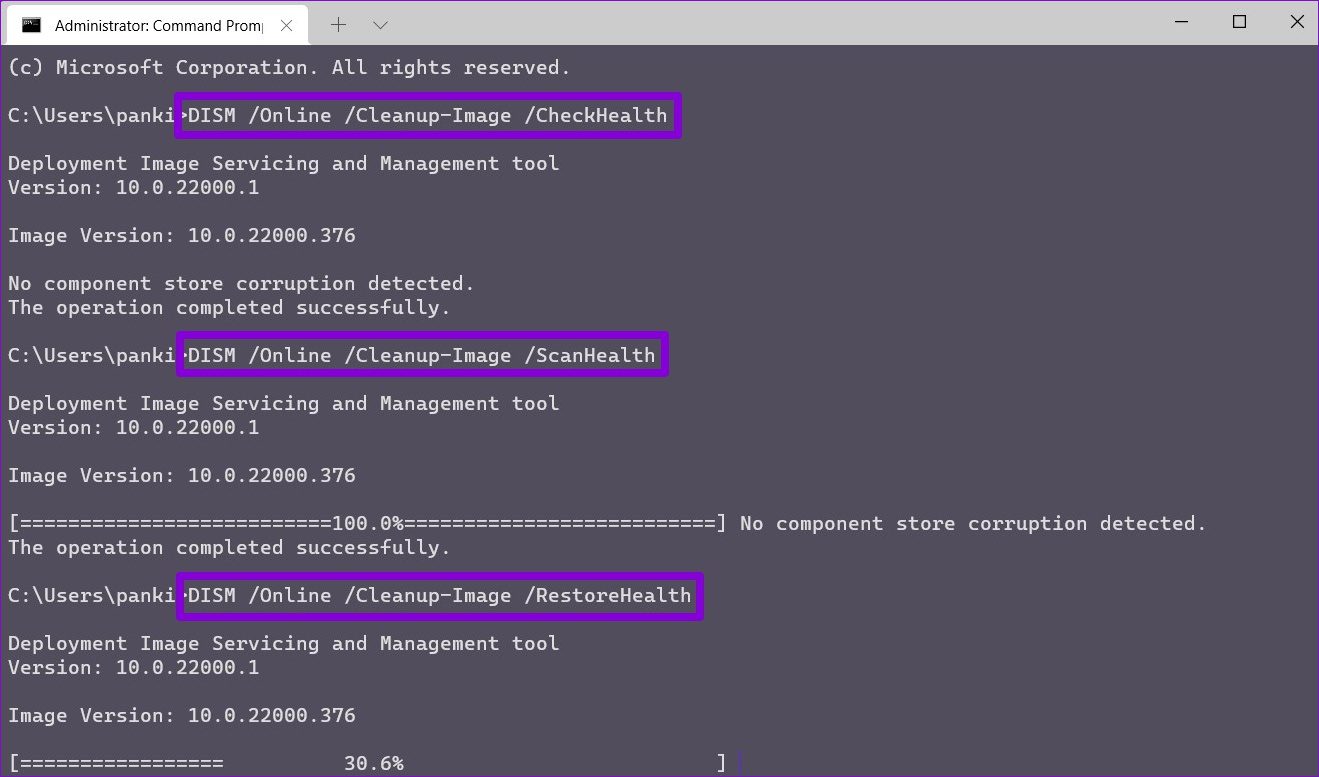
Run the DISM (Deployment Image Servicing & Management) scan after that. In addition to scanning system files, it will download whatever missing internal system files from Microsoft’s server if necessary.
Open the Windows Terminal with administrative privileges and enter the following commands.
After that, restart your computer to see if the error has been resolved.
4. IMPROVEMENT OF DRIVERS
Another likely cause of a ‘critical process died’ stop code is faulty drivers. It’s worthwhile to see if any of those drivers require an update or repair.
1: In the Taskbar, click the Search icon, type device manager, & press Enter.
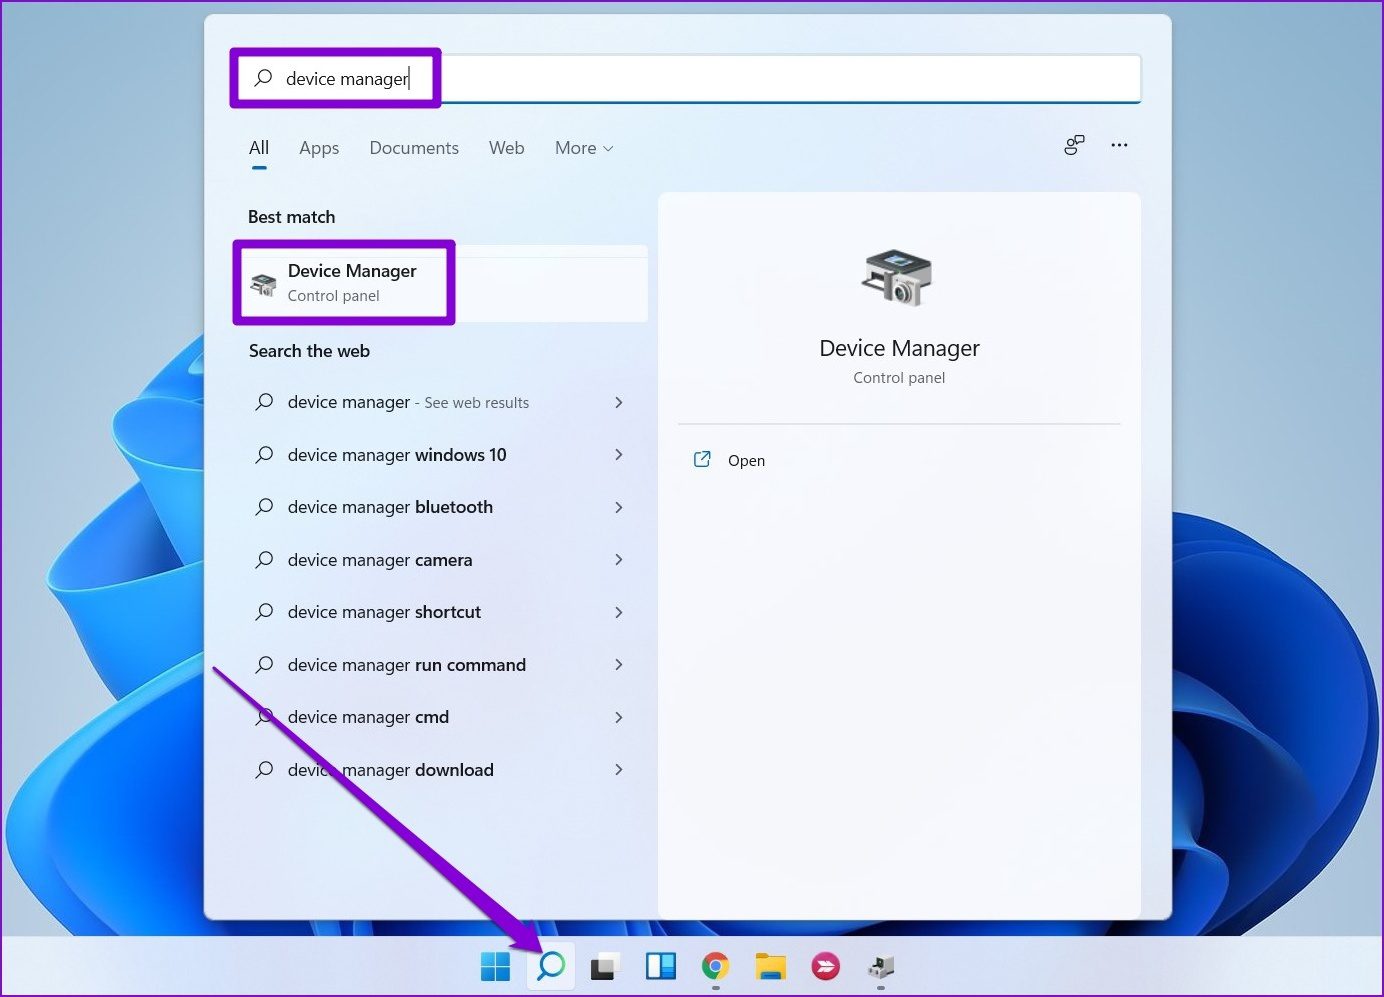
2: Go through the list & look for any drivers with a yellow exclamation mark. If it is discovered, right-click on it and choose the Update Driver option.

5. SCAN YOUR COMPUTER FOR MALWARE
Such errors occur if your computer has been infected with malware or a virus. You could also try running a full system scan with Windows Defender on your PC. You can also use any of your favorite antivirus programs for this purpose.
6. REMOVE RECENT WINDOWS UPDATES
Software updates can go wrong at times. If the error occurred only after installing a software update, uninstall any recently installed Windows updates. This is how.
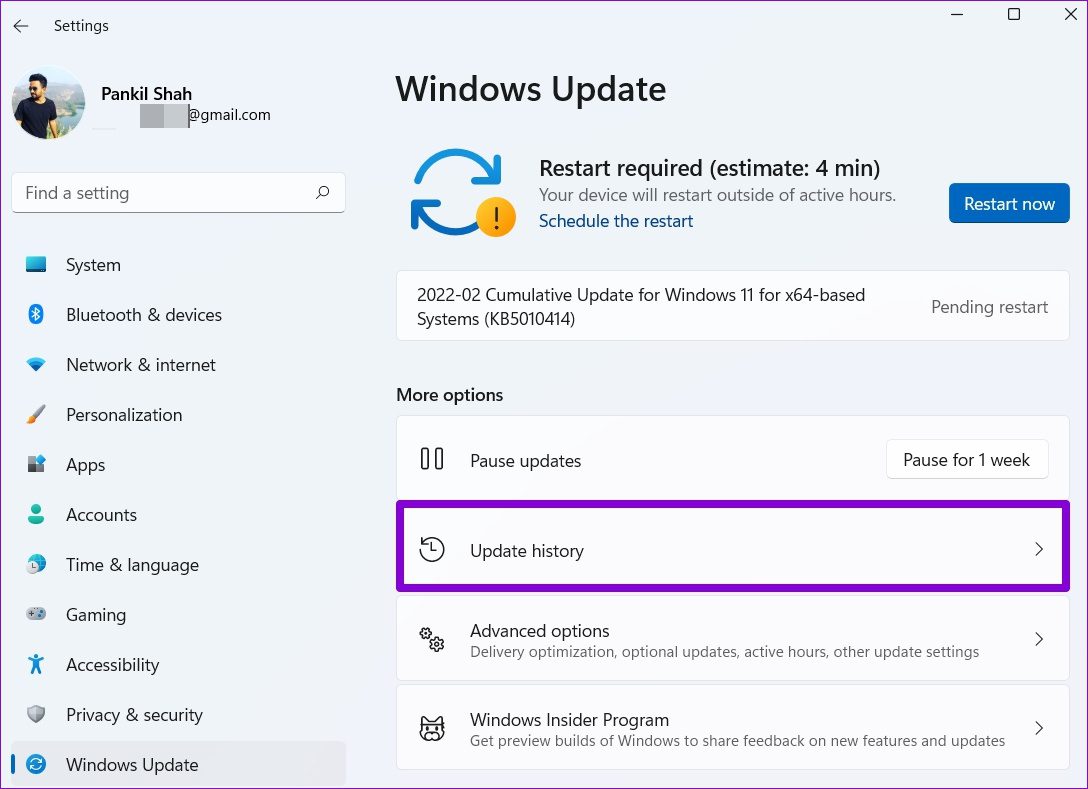
1: To open the Settings app, press Windows key + I. Go to the Windows Update tab & select Update history.
2: Scroll down to Related settings & select the Uninstall updates option.
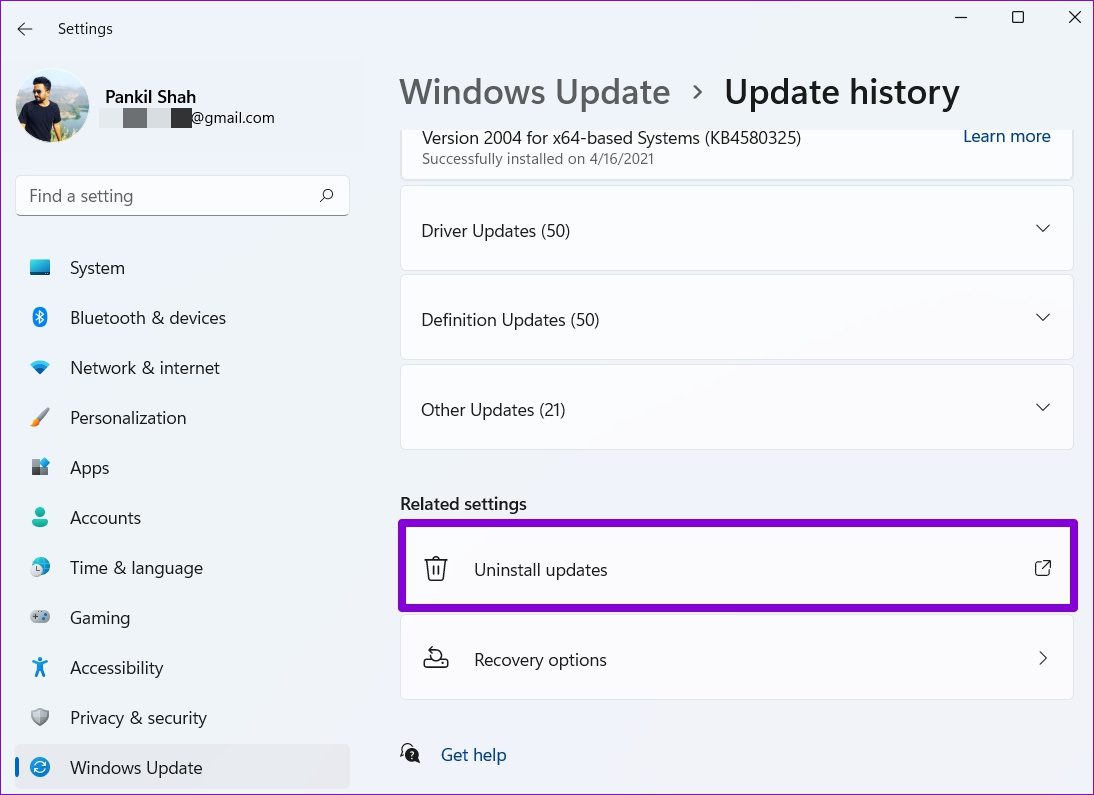
3: Choose the most recently installed update & click Uninstall.

7. EXECUTION SYSTEM RESTORE
Windows System Restore creates a backup of the entire system on a regular basis. If none of the above solutions work, you can use system restore to go back to a point before the error first appeared. This is how.
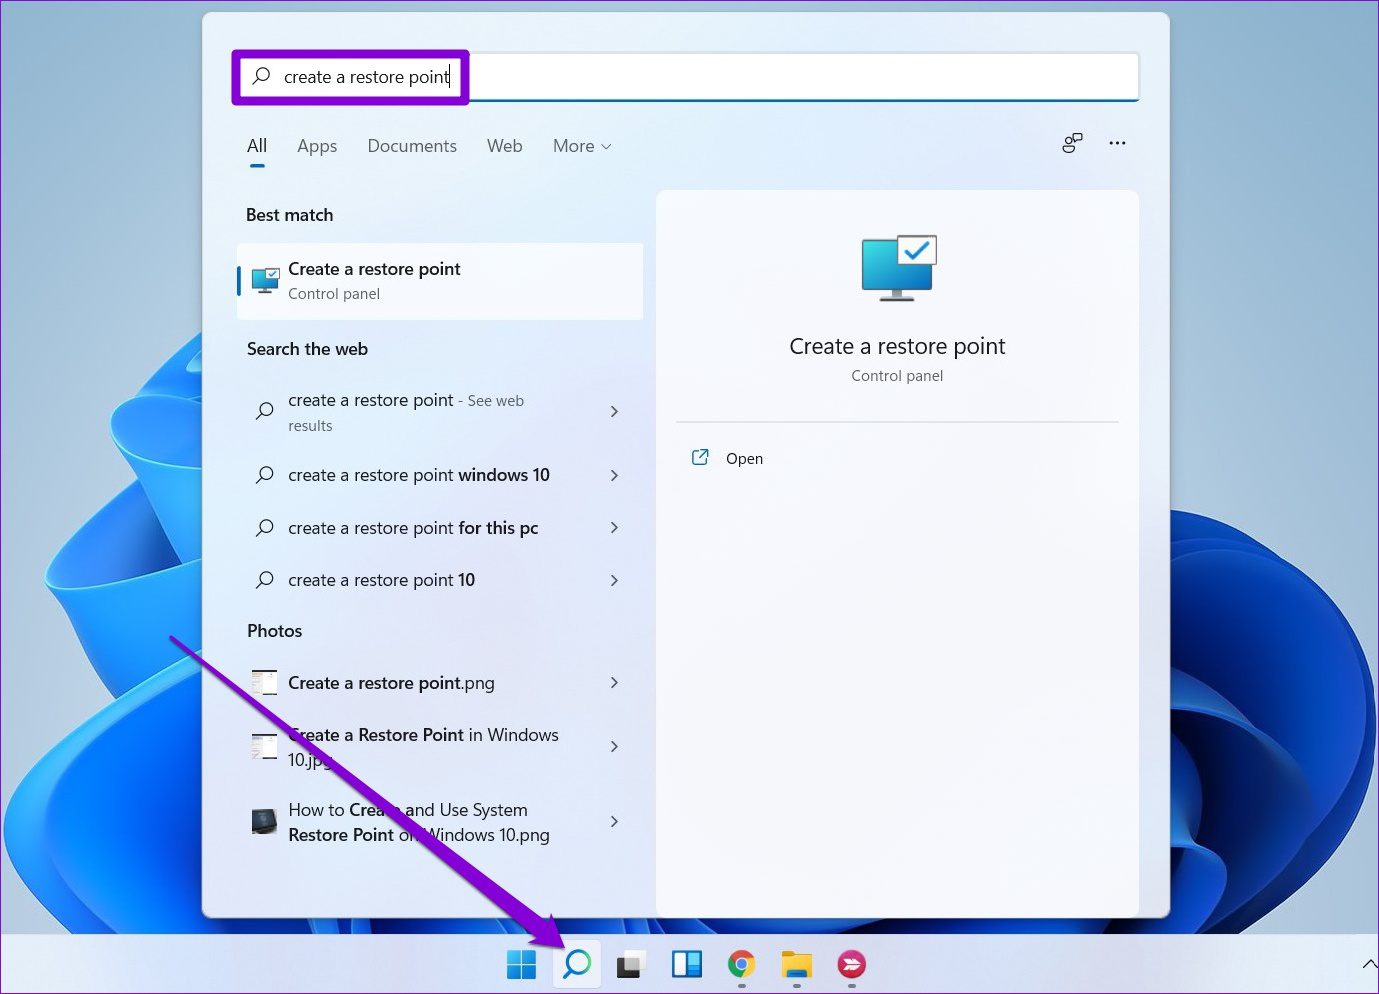
1: On the Taskbar, click the Search icon. Enter the command “create a restore point” and press Enter.
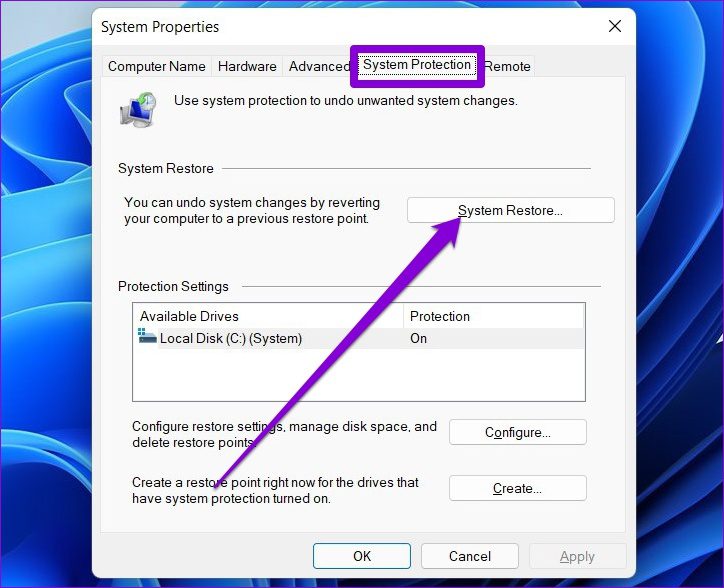
2: Select the System Restore option from the System Protection tab.
3: Here, you can either use the recommended restore point and otherwise create your own by selecting the second option.

Select a relevant restore point & press Next. Then, to restore the system, follow the on-screen instructions.
BELIEVE IN THE PROCESS
Such system errors could be aggravating because they prevent you from using your computer for an extended period of time and, in some cases, result in the loss of unsaved work. We’re confident that one of the solutions listed above has assisted you in dealing with the error, and you’re back to enjoying Windows 11.
Read more:
Error Code you get 080073DOD inside the Microsoft Store Windows(10/11)
How to Fix Windows 10 and 11 Screen Issue
Boot your Windows 11 into safe mode