Do you want to relocate your WordPress Hosting website to a different server/host? If YES, don’t do that without reading this full article. Here we are delivering how to move WordPress to a new server/host (no downtime). The biggest risk in this process such as web hosting or migrating a website to a new server is data loss and downtime. Both of these things can make your website inaccessible to users and search engines for a short period of time, resulting in lost sales and search engine rankings.
Moving WordPress to a new server or host can be a daunting task, not just for beginners but even for more experienced WordPress users.
All of this is due to the fact that migrating WordPress from one host to another is a whole different difficulty than starting a brand-new website.
Let’s look at the following easy steps.
- Make a copy of your current website
- Prepare new hosting company
- Upload the website to the new host
- Edit your local hosts file
- Install website via online installer
- Redirect the domain name
1. Make a Copy
When you wish to move WordPress to a new server/host (no downtime). The first thing you should do is generate a backup of the exsisting website. It will useful to the new host and restored there. Then, to keep your backup safe, you might use an online cloud service.
There are numerous ways to accomplish this. There are even businesses on the market that will handle the procedure for you, as well as a plethora of plugins that promise smooth backup/restore experiences. If you’re seeking a means to manage numerous WordPress sites, have a look at our list of the Best Tools to Backup Multiple WordPress Sites.
We’ll concentrate on one of the most effective options here. There are several causes for this.
- It can used on any host
- It’s free
- And works flawlessly.
Duplicator is a WordPress plugin that provides this approach. It’s been gaining a lot of positive attention on the internet, and for good reason. It’s as simple as that. Does the job.

So, first and foremost, install Duplicator. There are no surprises in the installation process because it is standard.
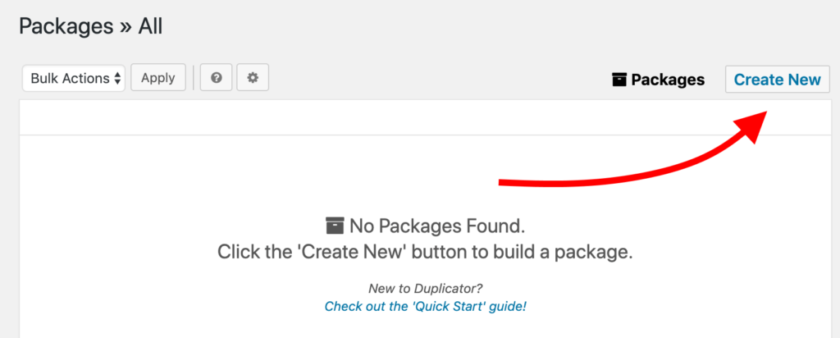
When you’ve finished installing the plugin, go to Duplicator and click the Create New button next to Packages:
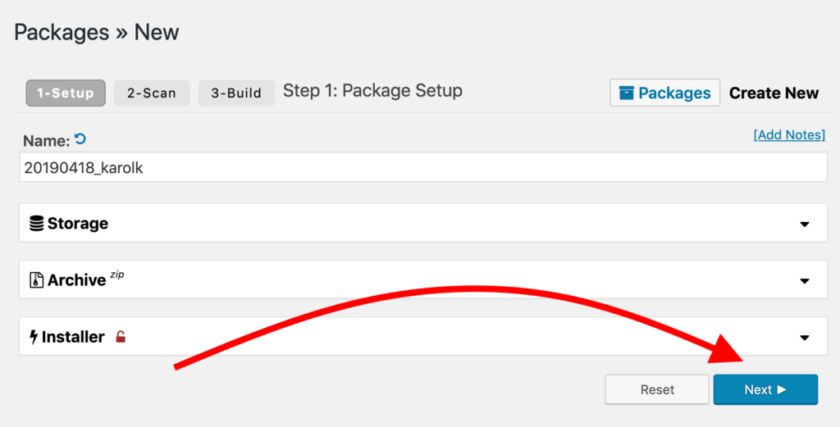
You can examine the backup parameters on the following screen if you like, but it’s not required. Simply click Next if you’re in a rush.
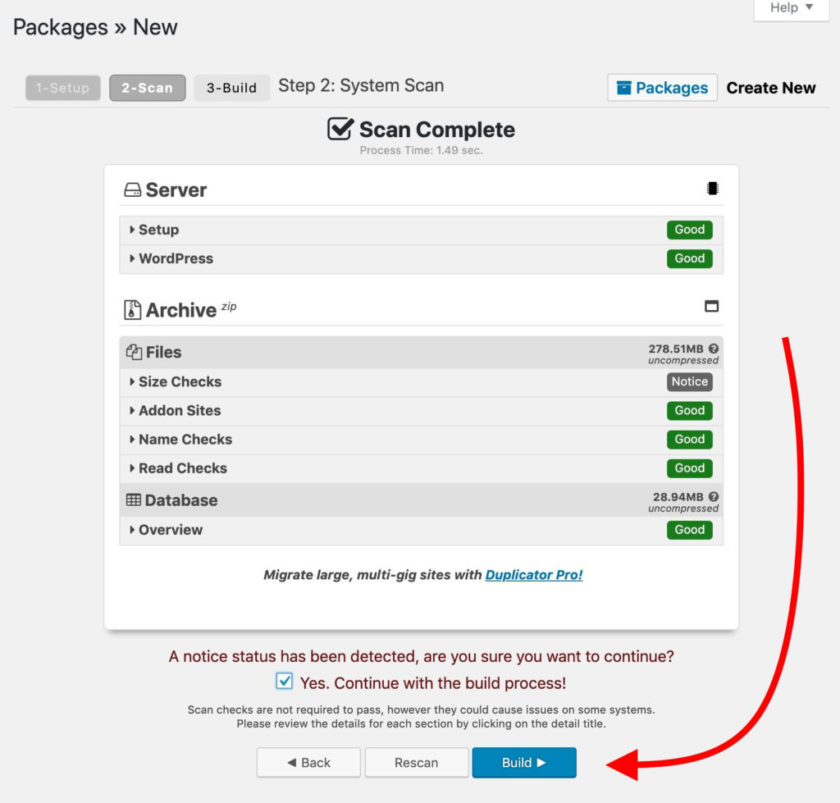
The following stage is where Duplicator examines your current hosting setup and determines how compatible it is in order to make the backup as painless as possible.
Depending on your host, you may get a message here and there, but in most circumstances, you don’t need to be concerned. Duplicator also offers advice on how to clear all of them and proceed with the backup.
Check the Yes field if you see any notices, then click the Build button. If there are no alerts, you can immediately click the Build button.
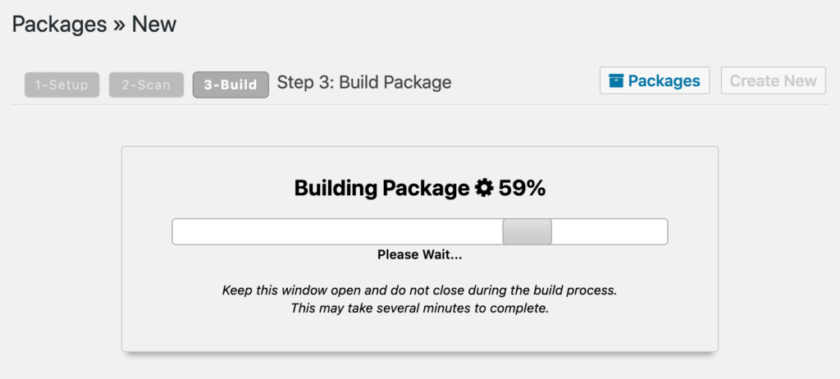
This is where Duplicator’s magic happens. Depending on the size of your site, the backup procedure may take some time. You have to keep the window open until the process is completed.
When the backup process is finished, the below screen can be view.
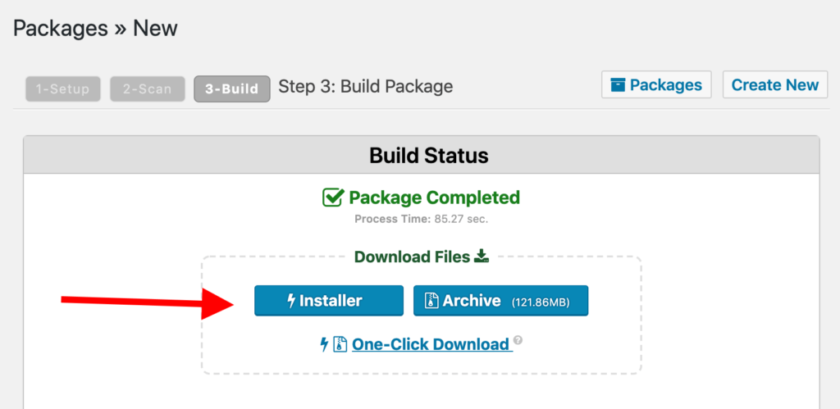
Download the backup archive as well as the installer file. You’ll need it for the next steps in the process of how to move WordPress to a new server/host (no downtime).
2. Prepare New Hosting Company
Have you decided on a WordPress-friendly hosting solution? If not, the results of our survey can assist you in making your selection.
Before you can send the backup to your new host, you must first prepare it by doing the following:
- Addition of your domain name to the server
- Make a new database for the website (optional)
- Your email addresses are duplicate
Next, we’ll go over how to do all of that:
If your new host utilizes a different administration panel, you need contact support to have those three actions completed for you.
Addition of Domain Name
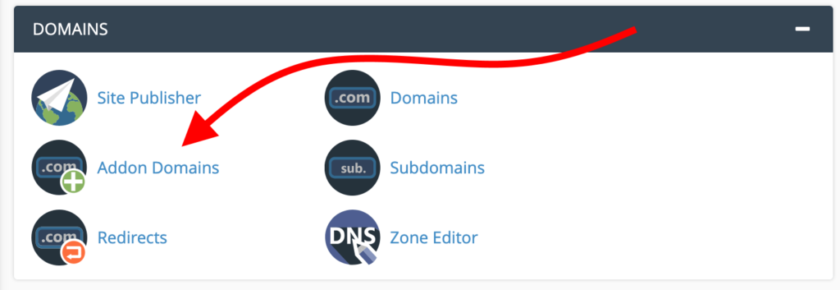
Frist click on ADDON DOMAINS from the Domains section. Refer below screen.
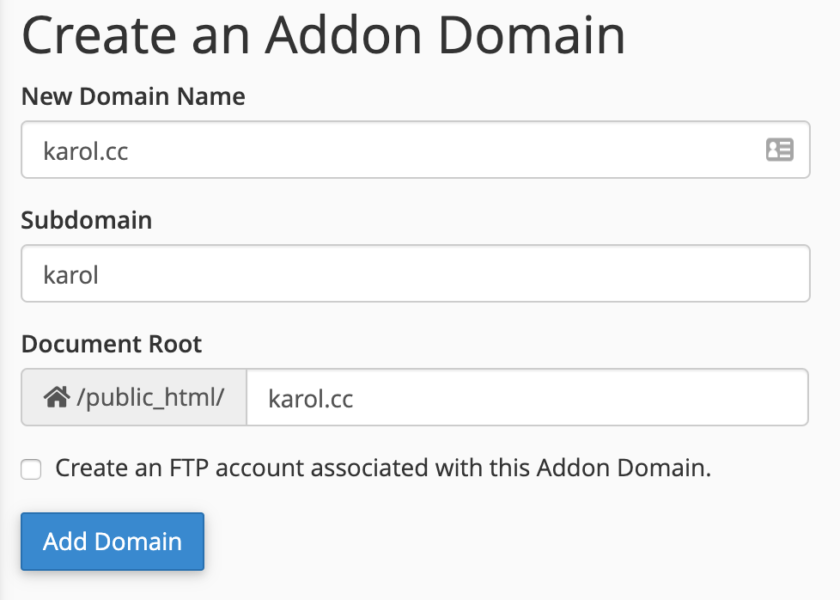
Enter your website domain name into the first field of the below screen (New Domain Name). The remaining fields will be filled out automatically. Then click on Add Domain.
Next dilogbox, you’ll see your new domain on the list. That means the server is ready to welcome your domain name and website.

Make a Fresh Database
The next step in transferring WordPress to a new server is to establish a blank database. This will be the new location for the data on your website.
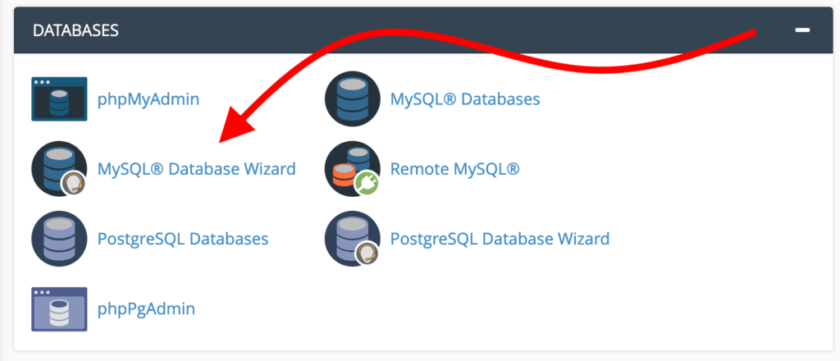
Scroll down to the DATABASES area and select MySQL Database Wizard to make a fresh database.
This is an easy-to-use, step-by-step interface that will walk you through the process of creating a new database.
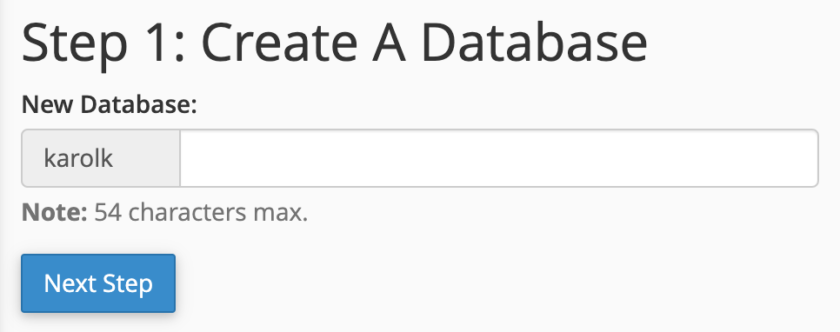
The first step is to give your database a name.
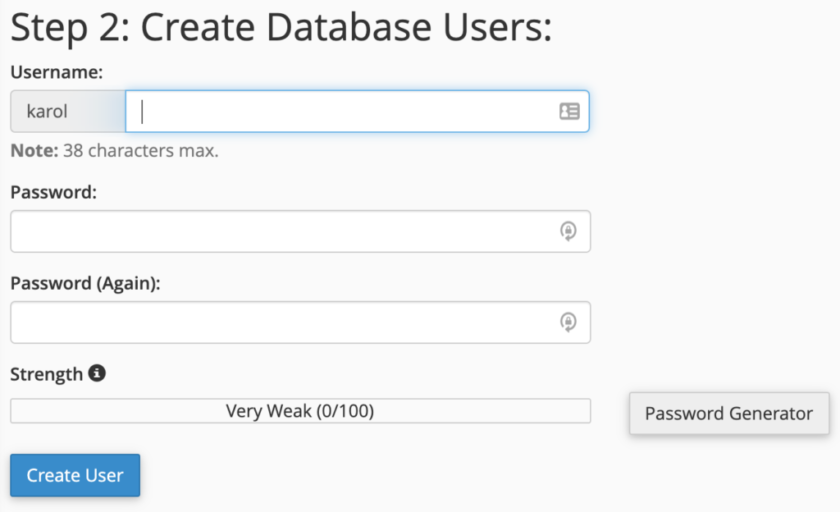
The second step is to create user accounts that will have access to the new database. WordPress communicates with the database using this new user account. Fill in the essential fields and keep a record of your login and password. Later on, you’ll require these.
Step 3 is the last one, and it involves assigning your new user account to the new database. Simply click Next Step after selecting All PRIVILEGES.
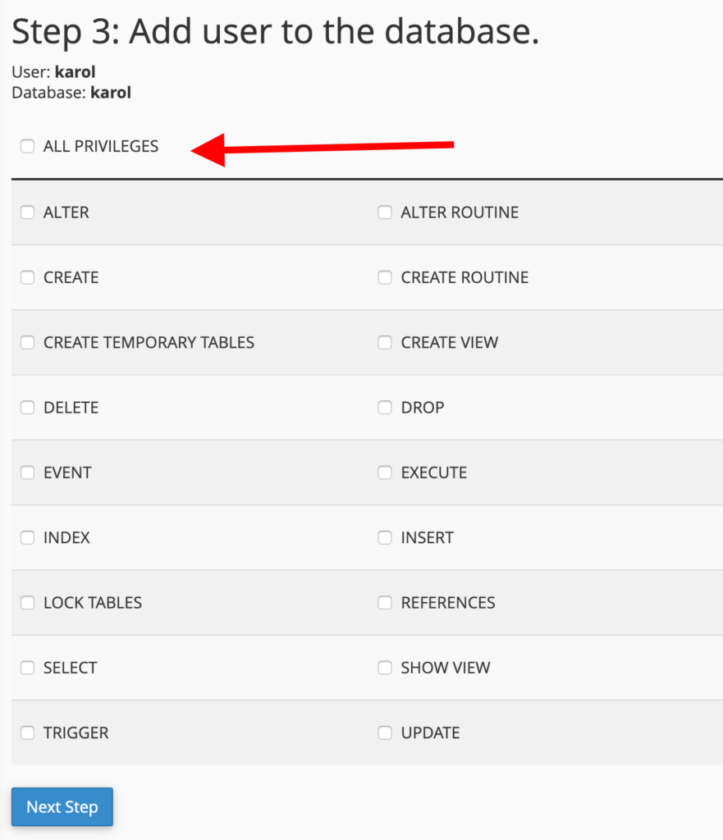
Done. The fresh database is added just now.
Next, as an optional, can transfer your email address to the new server.
The majority of users will have at least one custom email address associated with their domain name. Do you think so? Do you have an email address such as [email protected]?
If that’s the case, keep reading. Otherwise, move on to the next step.
When you migrate WordPress to a new server, you’re also effectively relocating your domain name to the new host, which means all of your emails will begin to arrive there.
If you don’t set up your email accounts correctly on the new server, your emails will either go missing or be tagged as “undelivered: the recipient doesn’t exist.” That’s probably not what you’re looking for. Fortunately, there is an easy way to avoid this. Refer below screen for an easy understanding of the right path.
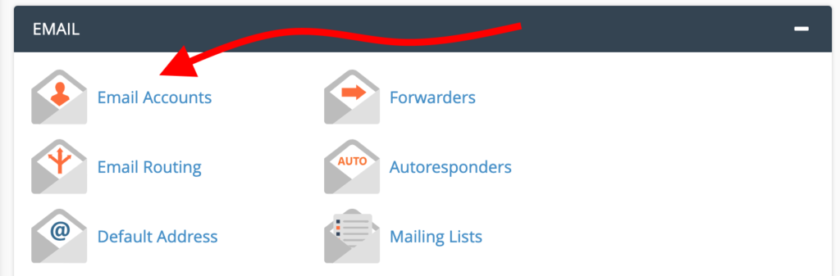
Click Email Accounts from the Email section.
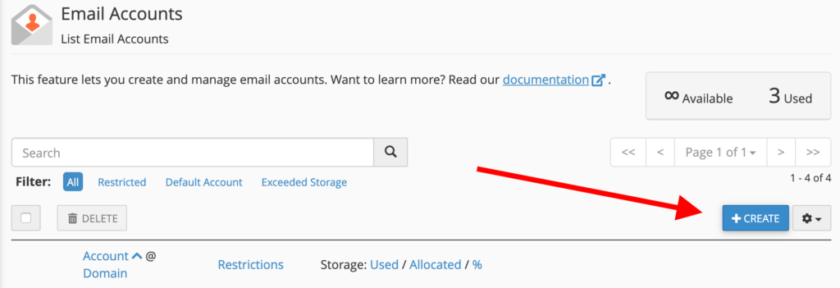
After that click on the +CREATE option available in the bottom area.
Now task in the board. That means now you can ADD current emails to the fresh server.
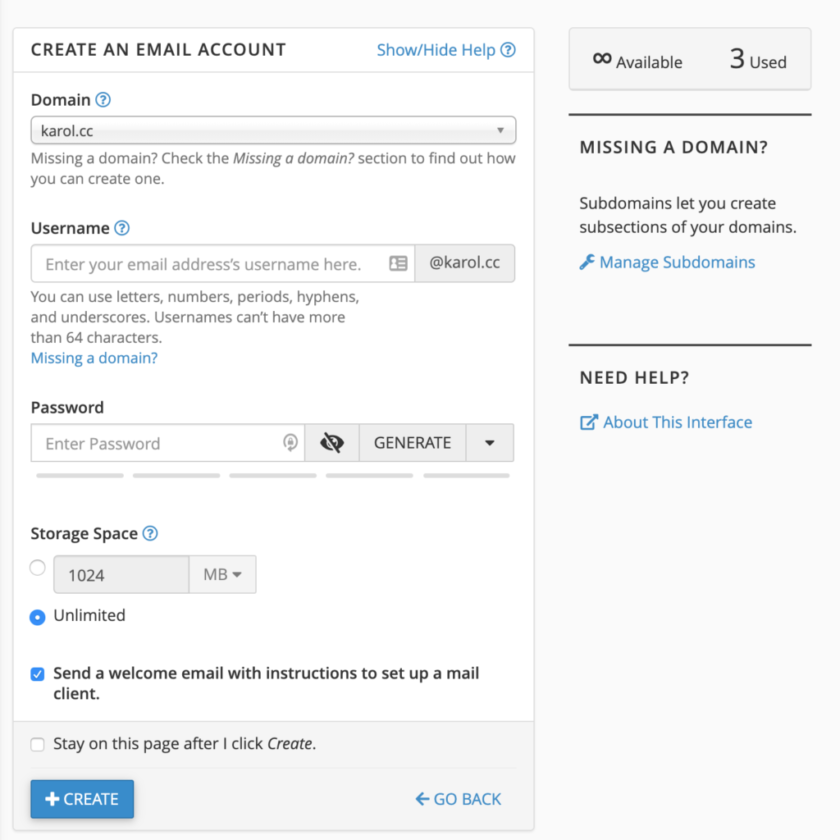
- Domain – Should be a NEW domain name
- Username – Highly important section. You must enter the same user name that you used for existing host. As a instant,, if previous email is
[email protected]then the username ishiru. - Password – The PW should be a NEW one., (No need to same as the previous one)
- Storage Space – Suitable option is set to Unlimited
Once you click on + Create, will finalize the email transfer process. If you having few emails created with previous host, do the same steps to the each email id.
At the end you can see your email as follows.

Now, NEW host is ready to accept any email which addressed to your domain.
3. Uploading Website to New Host
Already domain name,database as well as email are ready to transfer. Now you can upload your entire website backup to the fresh server.
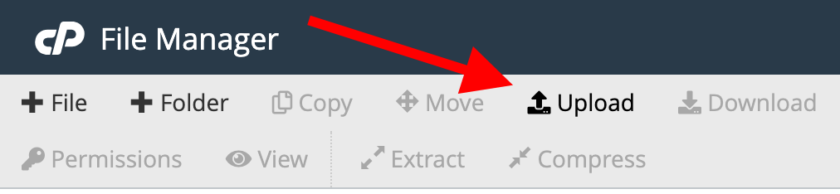
Go to the FILES section and click on File Manager:
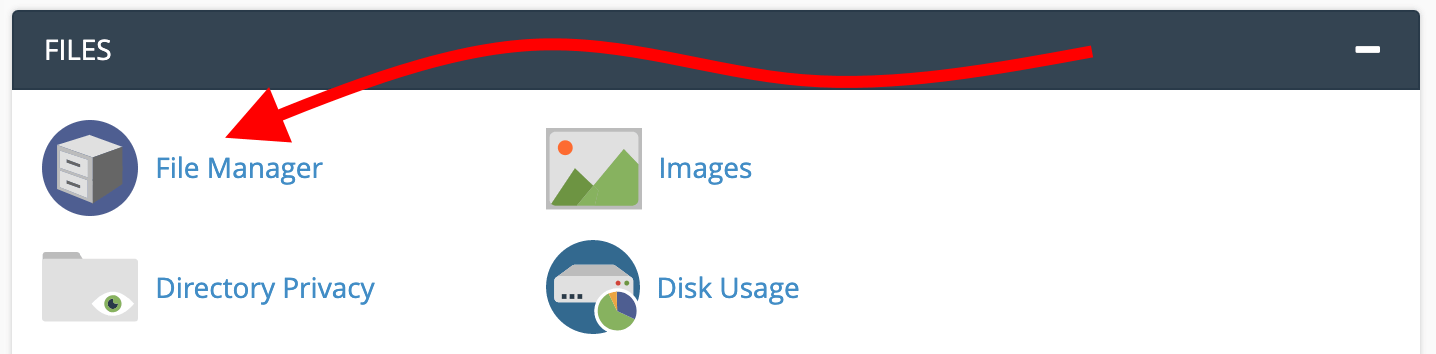
Navigate to the new domain name – the one you’re moving in – directory that has been created. In most circumstances, it’ll be something along those lines as public_html/YOURDOMAIN.com.
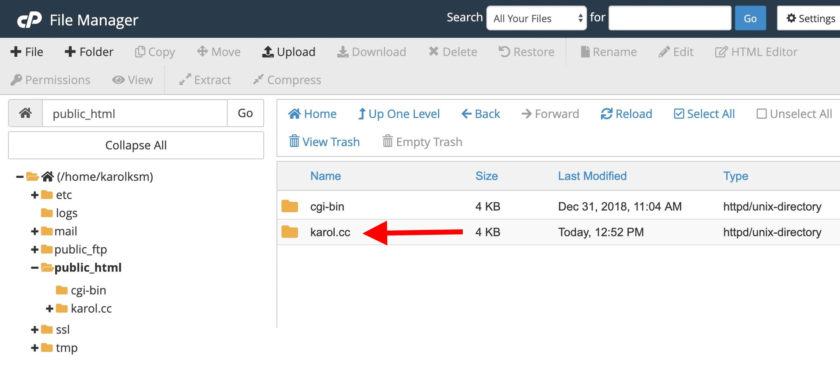
Normlly upload your site’s backups. The one you got from Duplicator – after you’ve arrived. Remember to include the archive (zip) as well as the installer.php file in your submission. When you move WordPress to a new host, everything will end up in this directory.
4. Edit Local Hosts File
Now you have almost done the job of move WordPress to a new server/host (no downtime). In this step, you’re totally ready to perform the last import of exsisting website and transfer all its files and data.
But, you should be able to access the fresh server through the any browser from your local computer before this final import. This is a very easy, but need to do very carefully and read next paragraph.
Your domain is not formally driven to the new server in this circumstance. Because we haven’t done it yet to avoid downtime, and we won’t do it until the last possible moment. This is good and lovely, but it also means that your new server is virtually inaccessible to the general public (including yourself) and cannot be directly accessed.
To get around this, you can manually configure your local computer to look for your website domain on the new server.
Following are steps:
First, go back to below screen and identify your new server’s IP address. This information is normally display in the sidebar. Example:
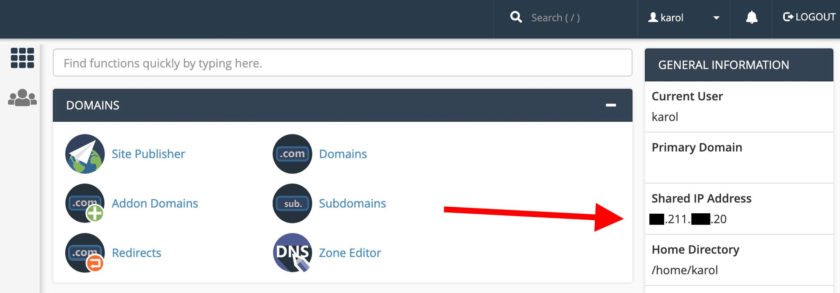
You’ll be redirected to the new server whenever you try to access your site from your web browser from now on.
Let’s be clear: only you have access to your site’s new server in this manner. When others try to see the site, they will still be directed to your old server. So, from their perspective, you haven’t yet moved WordPress to a new server.
5. Install via Online Installer
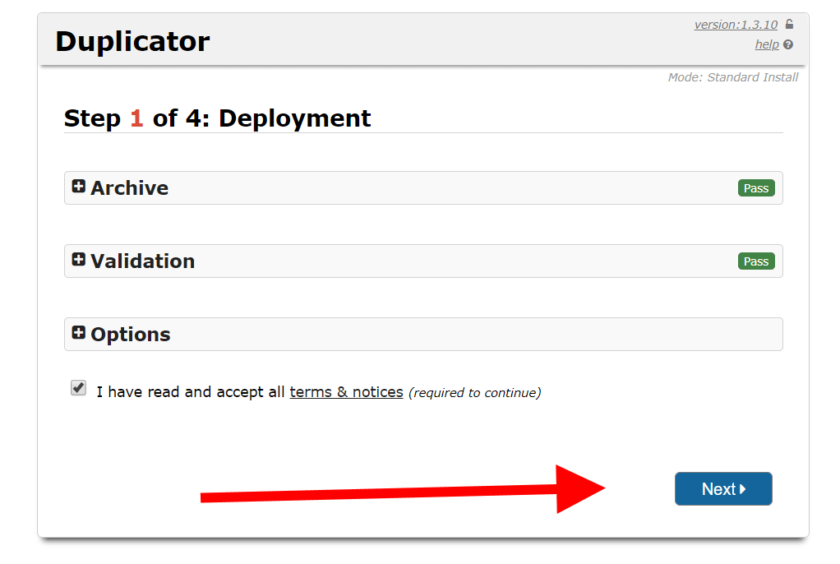
Start your browser and look around to YOURDOMAIN.com/installer.php. Then you will appear on the following screen. Accept all terms and click Next.
Now you can enter the connection details of your new database. The blank one you created previously.
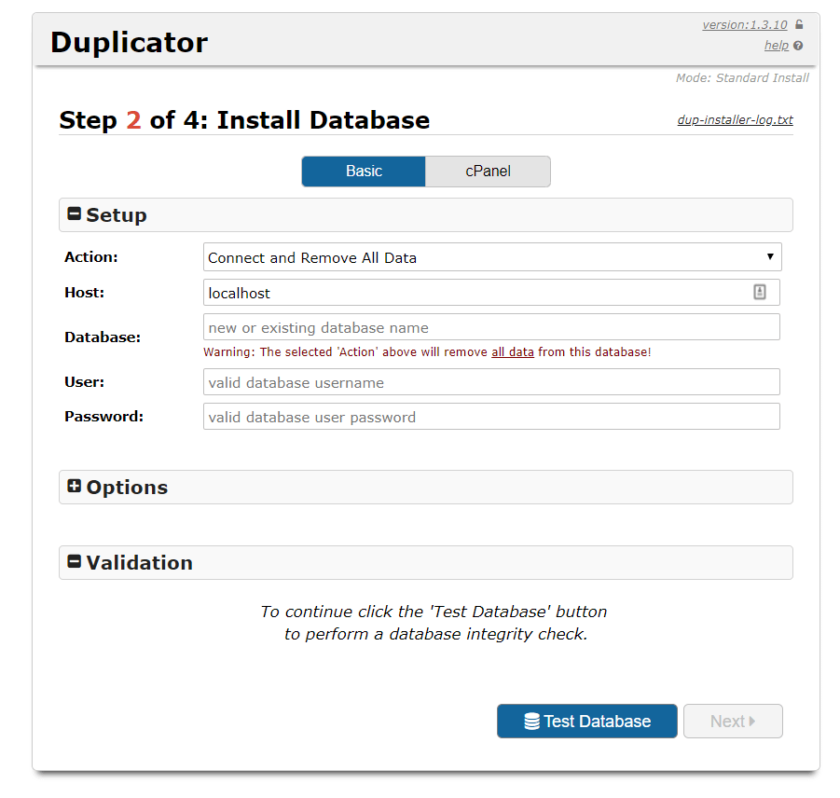
The Host parameter is set to local host for most hosts. When you’ve completed all of the fields, click Test Database.
If everything went correctly, you should see something like this:
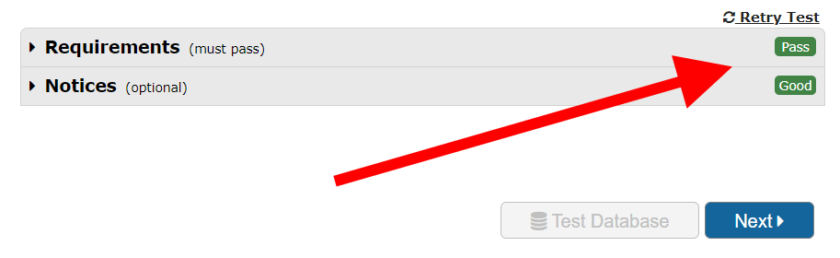
Just click on Next to go ahead, and then confirm the popup message to run the installer. To confirm the site title and URL, select NEXT again adjacent screen.
Very quickly the installation should be complete. When you successfully move WordPress to a fresh server, you should receive the following final confirmation message.
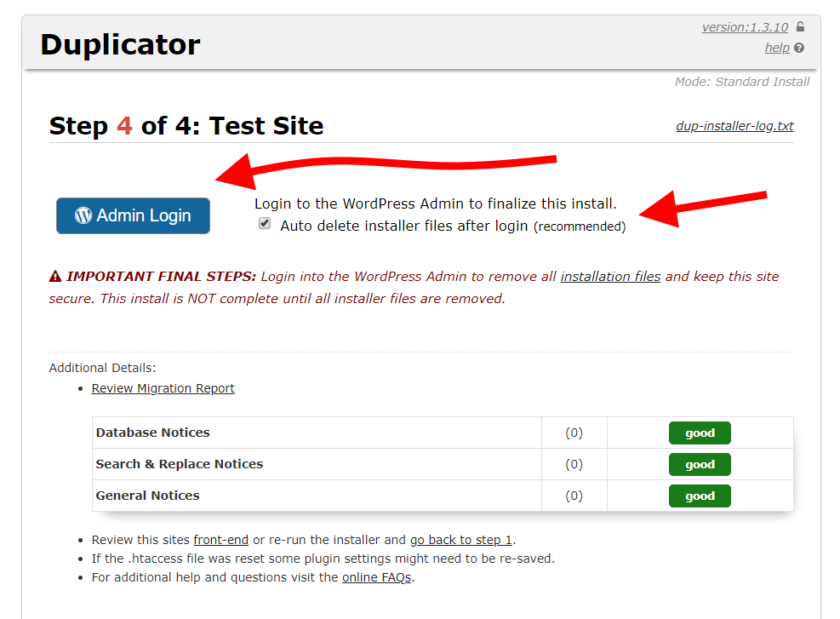
Checking the box labeled “Auto remove installer files…” is a good idea.
To access the WordPress dashboard of the site on the new host, click Admin Login. All of your WordPress accounts are identical to what they were before the site was transferred to the new host.
You’ll receive a confirmation that the installer files have been removed after you log in. You probably don’t need the Duplicator plugin any longer, so disable or remove it.
When you go to YOURDOMAIN.com, you’ll be able to see your website in all of its beauty on the new server. Just keep in mind that you’re the only one who can see it right now. Not public view yet. This is due to the hosts’ file issue we discussed a minute ago.
6. Domain Name Rederecting
Your website is fully transferred to the new server at this point. The last thing we need to do now informs the rest of the world (the web) to look for your site on the new server rather than the old one. You’ll have to go back to where you originally registered the domain to make those changes.
You’ll need to supply the DNS (Domain Name Server) addresses of your new name servers. The ones assigned to your new host. When altering the nameserver settings. Those namserver addresses will appear in the user panel of your new host.
At SiteGround, for example, you may find them under the My Accounts Information & Settings tab → Account DNS. Refer below screen.
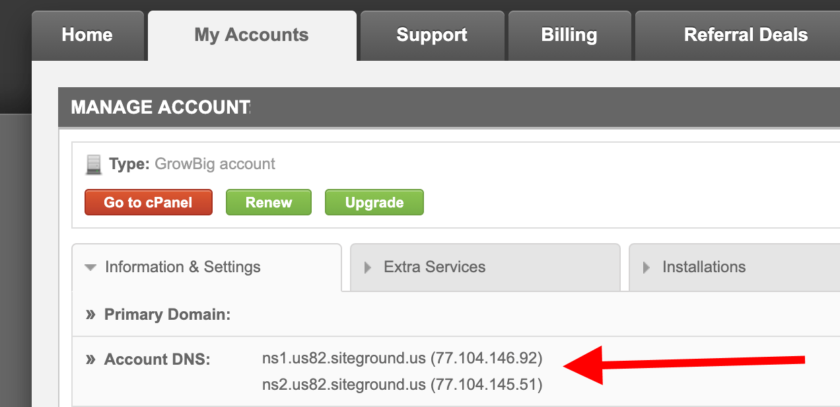
If you’re having difficulties determining the correct DNS addresses, you may always contact your new host’s support. No issue, they’ll let you know.
You’ll have to wait a while for your domain’s DNS settings to propagate throughout the internet once you’ve changed them to refer to the new server. This procedure typically takes 48 hours.
Wow….successfully migrating your website to a new server! You’ve now learned how to move WordPress to a new server/host (no downtime). Also waiting for another tutorial of worldpress.
Further if you have occured any issues in practical time, please submit a comment via our forum.
Lucas Noah, armed with a Bachelor’s degree in Information & Technology, stands as a prominent figure in the realm of tech journalism. Currently holding the position of Senior Admin, Lucas contributes his expertise to two esteemed companies: OceanaExpress LLC and CreativeOutrank LLC. His... Read more