Many signs warn you that your external hard drive is probably experiencing logical corruption. Sometimes, the external hard drive is not showing up on your Mac, you cannot read or access the content on your portable hard drive, and an error notice stating “the disk you inserted is not readable” appears when you connect an external hard drive to your Mac.
This article explains how to repair a corrupted hard drive with Mac’s built-in utilities, fix the external hard drive by formatting it, and the steps to recover data from corrupted portable hard drives. Related post: How to Format External Hard Drive for Mac and PC?
Part I. Fix a corrupted external hard drive on Mac (No formatting needed)
In some cases, your external hard drive won’t appear on a Mac only because of a poor physical connection between the device and the computer. To diagnose if there is a problem with the IDE or SATA USB connection, you can plug your portable hard drive into a different USB port, check if the cable is frayed, and try connecting the device straight to the computer. Furthermore, you can enable the option of external hard drive visibility to check if the device will show up on Mac.
If you are sure the hardware connection has no problem but your external hard drive still does not show up, the device should have been corrupted. How can I fix the corrupted external hard drive on Mac?
Way 1. Use Disk Utility to perform First Aid on the faulty drive
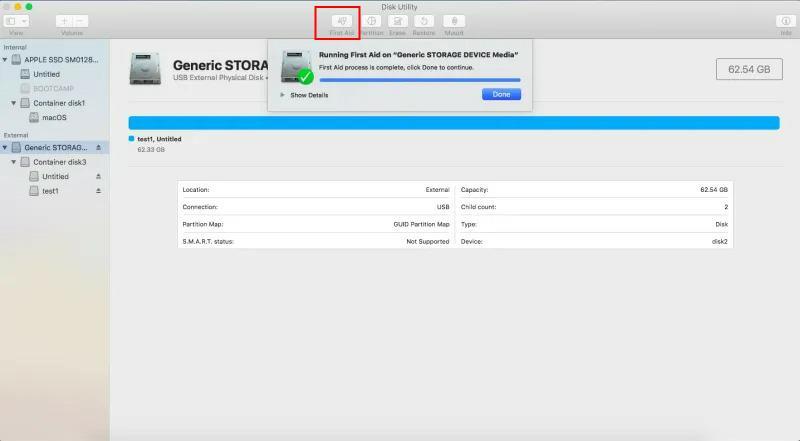
The pre-installed app Disk Utility on every Mac offers users a handy way to manage and repair the internal disks and external storage devices. If you think there is a problem with an external storage device, and want to repair it, the First Aid feature in Disk Utility can give you a hand. Follow these steps to repair a corrupted external hard disk on Mac through Disk Utility:
Step 1. Click the “Finder” icon in the dock, select “Applications” – choose “Utilities” and then select “Disk Utility” from there.
Step 2: From the drives shown in the sidebar, choose the external hard drive with which you are having problems.
Step 3: Choose “First Aid” at the top (check out the image for reference) and wait untill Disk Utility completes fixing the disk errors.
Way 2. Use FSCK command to fix your external hard drive on Mac (A little difficult)
You can try a different approach, the FSCK command, if Disk Utility didn’t work after you attempted to use it to repair the damaged hard drive on a Mac computer. However, you cannot cancel the operations midway.
Step 1. Select Utilities folder in the Finder-> double-click on “Terminal” to open it-> type “diskutil list” , then Terminal app will list all the internal disks, external disks, and other USB-connected devices that are connected to this Mac computer.
Step 2. From the disks listed, please find your faulty external hard drive, and then find its drive identifier (in most cases, it is shown as disk0, disk1, or disk# on the right side).
Step 3. Boot Single User Mode: restart your Mac, and hold down the “Command + S” keys, then release the keys when the Apple login window displays.
Step 4. Some white text will slide down as soon as you enter your username and password on Mac. When that stops, type the command “/sbin/fsck -fy.” and then hit Enter.
Step 5. Now you should type in this command: “/sbin/fsck_hfs -fy /dev/[drive identifier]”. (When needed, please replace hfs with the correct file system of this external hard drive, and replace [drive identifier] with the identifier of this portable device you got with the “diskutil list” command.)
Step 6. After the fsck command has successfully checked and repaired the file system of your faulty hard drive, you can type “reboot” into the command prompt, and at last, press Enter to restart your Mac.
Part II. Fix corrupted external hard drive on Mac by reformatting it
Reformatting the file system of an internal or external disk on the Mac is also called “erasing.” Reformatting or easing will result in irreversible data loss. When too many bad sectors stop you from writing in new data on your external hard drive or you cannot visit or read the files on your storage device, you might want to reformat or erase it and make it usable again. Using the Disk Utility program. To format an external hard disk on a Mac is easy for beginners. Connect your external hard drive to a Mac computer, then follow the tutorial to reformat the device.
Step 1: Click Launchpad -> type “Disk Utility” in the search box -> then click the app icon.
Step 2: Find your portable hard drive from the list of drives on the left-hand side of the window, choose it, and click “Erase.”
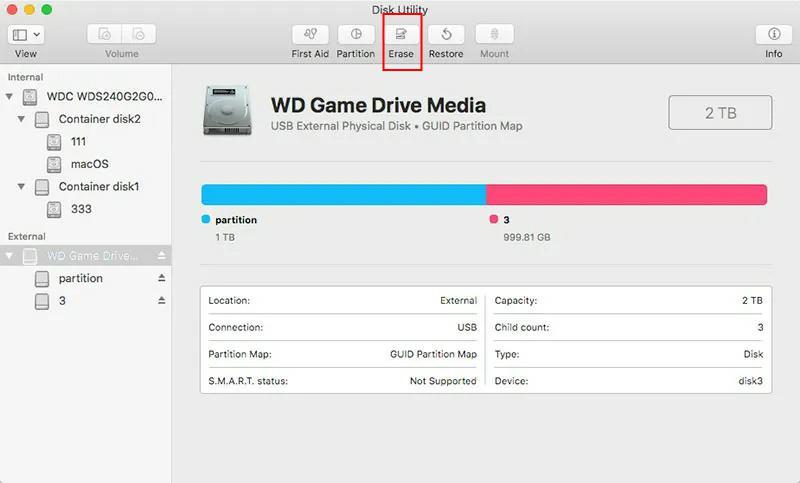
Step 3: Rename your disk, and choose a new format and scheme for your device.

There are 10 options of file system format for you to choose from, including APSF, APFS (Encrypted), APFS (Case-sensitive), APFS (Case-sensitive, Encrypted), Mac OS Extended (Journaled), Mac OS Extended (Journaled, Encrypted), Mac OS Extended (Case-sensitive, Journaled) and MS-DOS (FAT).
You can select one partition map scheme from the three choices, namely, GUID Partition Map, Master Boot Record, and Apple Partition Map.
Step 4: Make sure everything looks OK, then click “Erase”, and the Disk Utility app will begin to format the device to your desired new file system.
Part III. Use software to recover lost data from corrupted external drives on Mac
Disk Utility can repair minor disk errors, but if it fails to repair your corrupted external hard drive, you will have to reformat the device to make it usable. But bear in mind that formatting will wipe all data from your storage device.
You shouldn’t worry if the portable hard drive does not contain any crucial files. But if you have lost some important files after reformatting the external hard drive, you should find effective data recovery tools to recover them as soon as possible.
iBoysoft Data Recovery for Mac is a professional, easy-to-use recovery software to get back lost files from formatted or unreadable external hard drives. Besides, you can also use it to perform data recovery on Mac internal HDD, SSD, SD cards, memory cards, digital cameras, etc.
To recover lost data from corrupted external drives on Mac, you could download iBoysoft Data Recovery for Mac from the official website, launch the software, connect the corrupted hard drive to your computer, and follow these steps.
- On the left panel of the software interface, find the corrupted external hard, select it, and then click “Search for Lost Data” at the bottom.
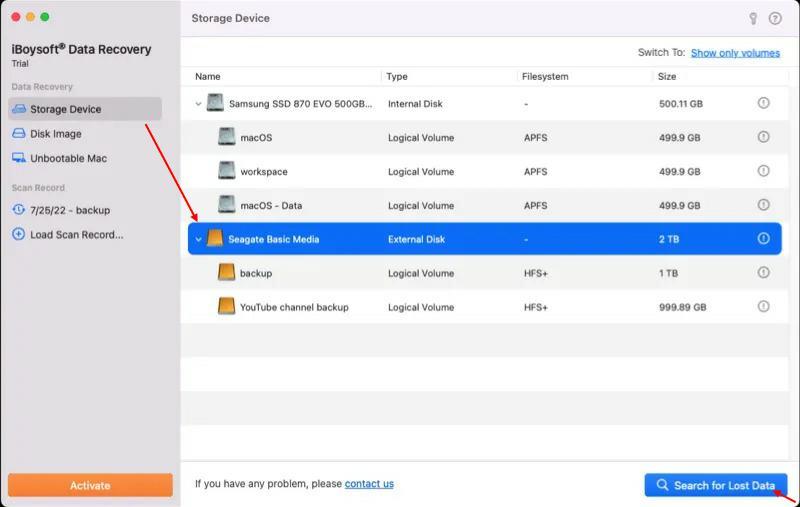
- When the data scanning is done, the software will display all files found on your device in the folder of “Quick result on HFS+” or “Complete result on HFS+”
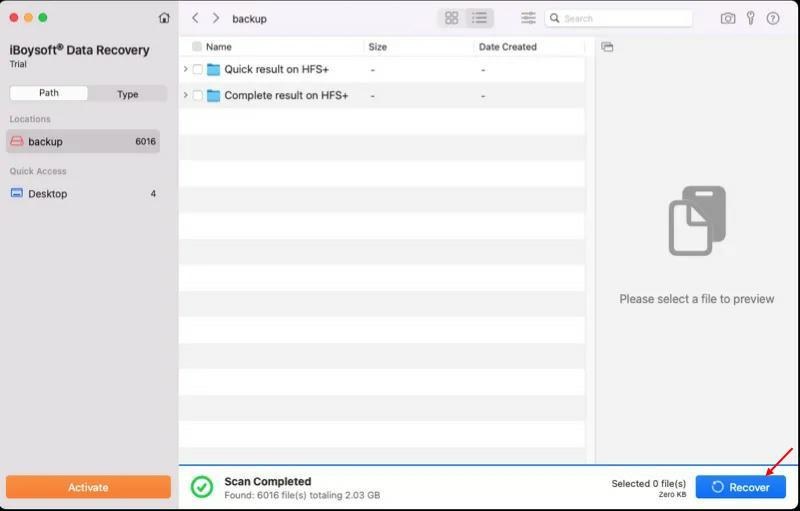
3). Click to preview the files (if you see the preview, iBoysoft Data Recovery for Mac can recover that file correctly), tick the box next to the file you want to restore to choose it, and finally, click the Recover button. In this step, do remember to save the recoverable file to another storage device.
Lucas Noah, armed with a Bachelor’s degree in Information & Technology, stands as a prominent figure in the realm of tech journalism. Currently holding the position of Senior Admin, Lucas contributes his expertise to two esteemed companies: OceanaExpress LLC and CreativeOutrank LLC. His... Read more