
This article is expected to present in detail about Disable Windows 11 Firewall temporarily and permanently and Allow a specific application to bypass Windows firewall.
The system’s built-in firewall, the Microsoft Defender Firewall, was created to watch over incoming and outgoing network traffic and permit or deny connections based on predetermined rules to safeguard your computer and data from illegal access.
Let’s see how to Disable Windows 11 Firewall temporarily and permanently using Windows Security & Control Panel on Windows 11.
Disable Windows 11 Firewall Temporarily
The Windows 11 firewall should always be active. Your Windows 11 PC comes with a firewall called Windows Defender. As we said before, it is crucial that it is always enabled in order to stop illegal access to your computer. But there may be some situations when you need to turn it off for a number of reasons. When you need to use a different security program, test an application over the network, let the installation of some software without interruption or debug a network issue, as examples.
Once you’ve accomplished what you need to do, you should re-enable Windows firewall to keep your computer safe. Doing so will temporarily disable network protection. It’s actually quite simple to disable the firewall through Windows Settings. Here is how Windows 11 accomplishes it:
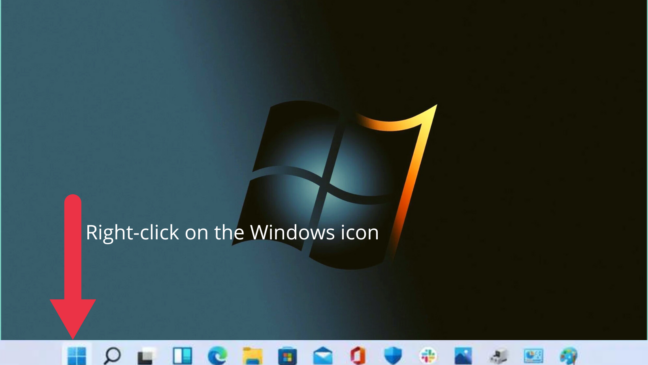
To open the settings menu, right-click on the Windows symbol in the taskbar.
Look for Settings, then click it.

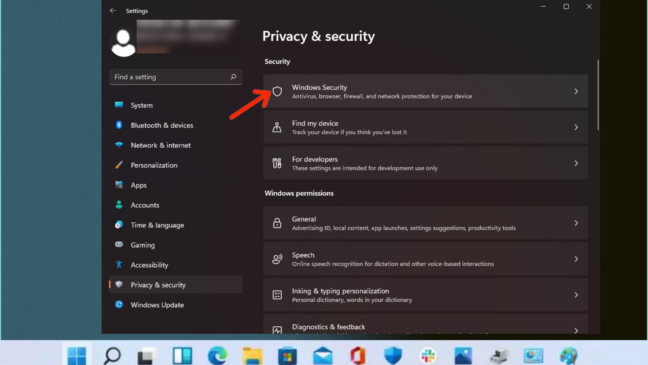
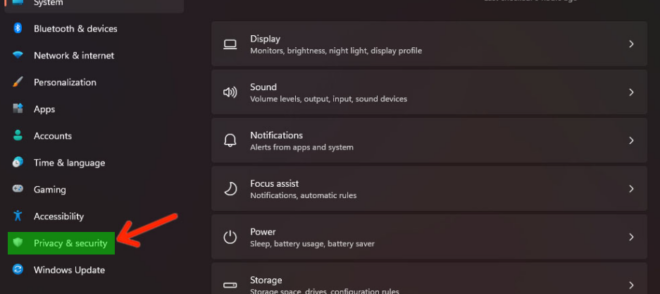
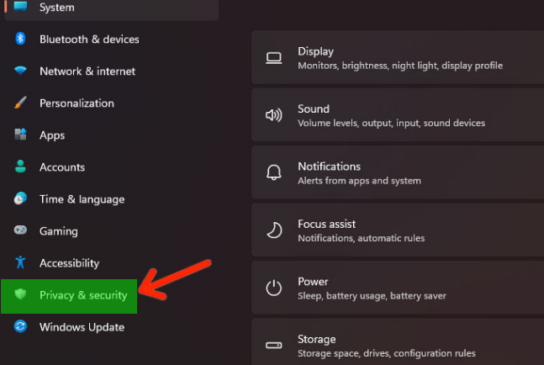
Search for Privacy & security on the left panel and click on it.

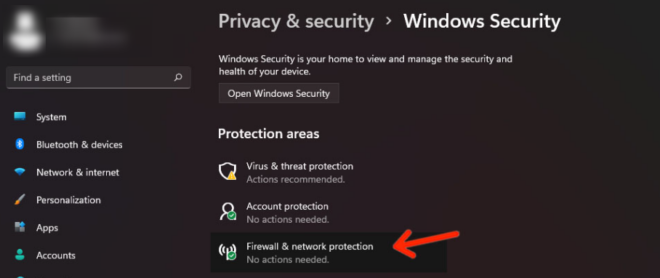
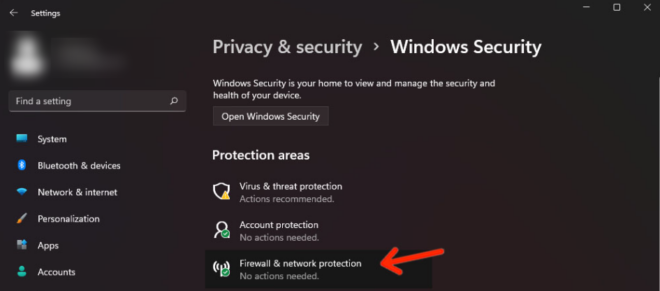
Click Windows Security under the Security section.
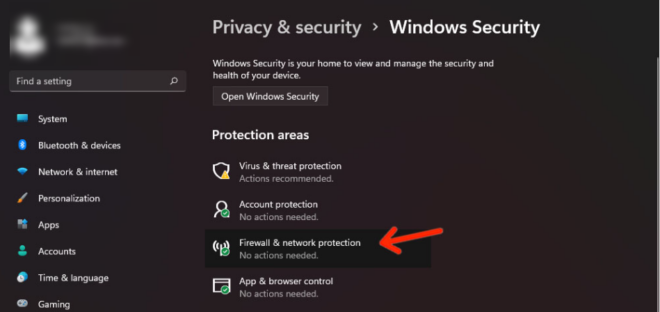
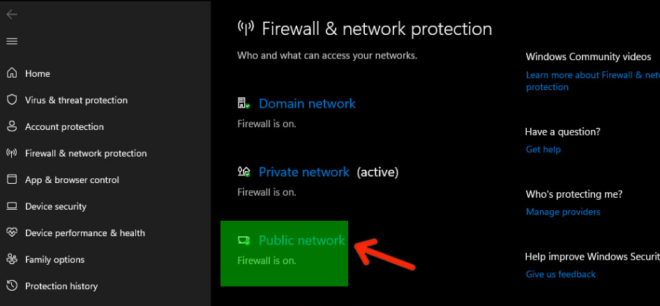
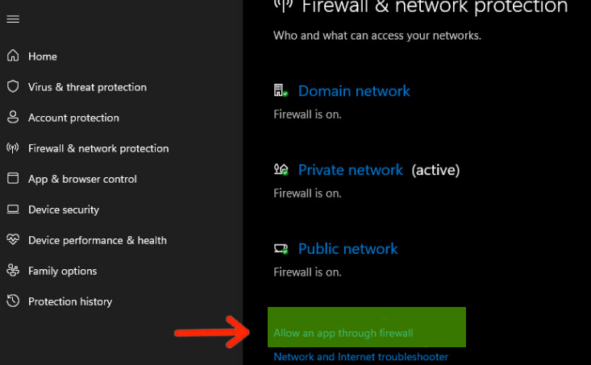
After finding it, click on Firewall & network protection.
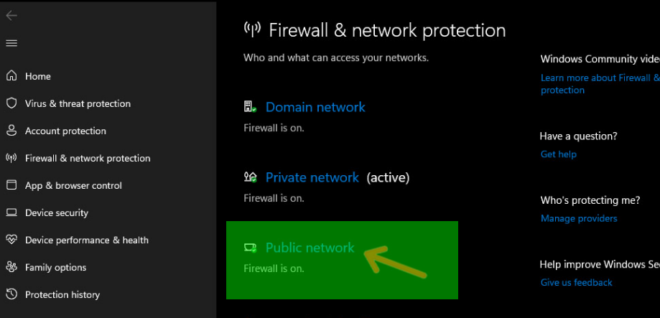
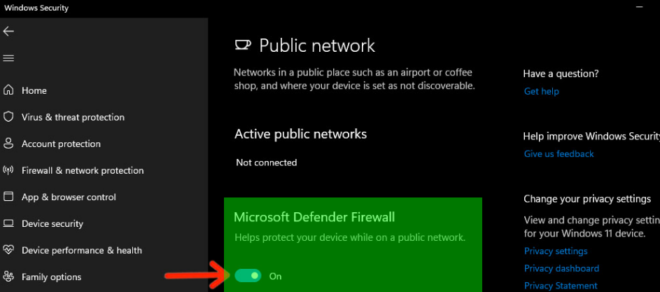
To access your computer’s network protection settings, click Public network in the new window that appears.
In order to disable Microsoft Defender Firewall, click the toggle switch immediately below it.
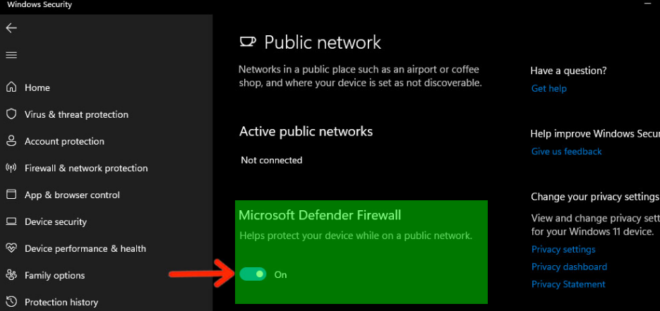
Then the Windows firewall will be automatically disabled, leaving your computer open to network attacks. Therefore, do whatever you want that requires you to turn off the firewall and then turn it back on. Simply toggle the switch back to activate it again, and it will turn blue to indicate that your PC is secure. It is crucial that you are familiar with your computer’s Firewall settings so that you can locate them quickly.
Disable Windows 11 Firewall Permanently
There are situations when the Windows Defender firewall may interrupt with your work, even though it’s good to have more restrictive Windows firewall settings, especially if you have a lot of information or data kept on your computer that need to be safeguarded at all times.
Therefore, it makes sense that some users would wish to turn off the firewall in Windows 11 in order to avoid the various connectivity issues you can have on a daily basis. If you belong to this group, follow these instructions to turn off your computer’s firewall network protection:
After opening Settings, select Privacy & security.
Next, Click Windows Security.

Click Firewall & network protection.
Click Public network in the new window that appears.
To disable Microsoft Defender Firewall, click the toggle switch directly underneath it.
In essence, it’s the same as the prior process and it functions whether your network is public or private. But if you continue to have very poor Windows security, it’s up to you to cope with dangerous software and attacks.
Allow An Application through Windows Firewall
Regardless of whether you’re connected to a private or public network, Windows 11 allows you to choose any application you wish to run without being blocked by the firewall.
Basically, it is preferable to allow a few apps a temporary pass via the Windows Defender firewall rather than permanently turning off network protection on your computer if there are only a few apps that you wish to let access the Internet without any restrictions. There will be little to no possible hazards from programs that can get around the firewall settings on your Windows 11 system as long as you have other Windows security safeguards activated.
On the other hand, you can alter settings on the same Windows settings screen to withdraw the rights of authorized programs. Here is how to accomplish it:
Launch Settings, then select Privacy & security.
Select Firewall & network protection from the Windows Security menu.
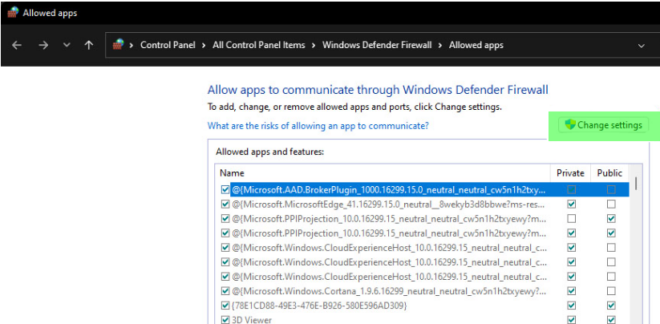
A new window will open; click the “Allow an app through firewall” link there.
Select “Change settings” from the menu.
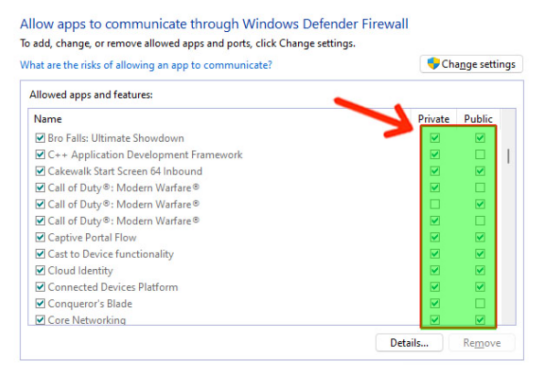
At this point, you can select the programs you want to allow over the Windows firewall on either a private or public network.
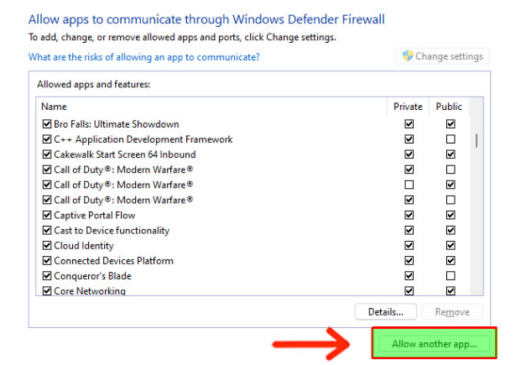
Find the program on your computer if it isn’t listed by clicking Allow another app.
After completing the process, click OK to close the windows.
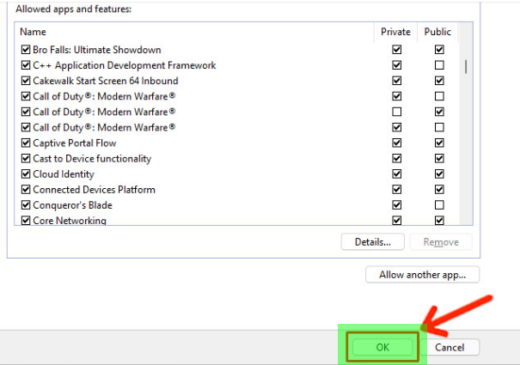
Until you disable or alter the firewall settings later, the program you added is now permitted to evade the Windows Defender firewall.
FAQ :
Apart from this, are there any methods available to disable the windows 11 firewall?
There are many ways to disable the Windows 11 firewall. You can disable Windows 11 Firewall using these methods such as, Using Windows Security on Windows 11, Using Control Panel on Windows 11, Using Command Prompt on Windows 11, and Using PowerShell on Windows 11.
You may like to read :