Capturing perfect photos is not always a simple and easy task. Professional photographers need to struggle a lot to get some perfect shots. Taking perfect shots will depend on various factors. When you can combine all those factors, you can hope to have a perfect shot.
But when you have a raw version of a picture, you can also make it perfect by giving it some retouch. Especially nonprofessional photographers prefer to use photo retouching services to make their photos perfect.
In the following article, we are going to know some useful photo retouching tips and tricks. Keep reading to find out more. Check this : online photo editor
6 Useful Photo Retouching Ideas Tips for You
Here are some tips that can turn a dull photo into a beautiful one. Further, it will change your whole concept of image perfection techniques.
So, let’s get started.
Adjust the brightness and contrast of the photo:
While working with a raw photo, the first thing you need to do is adjust the brightness. Sometimes, exposure to light can get overexposed. In that case, you can fine-tune the color temperature and warmness of the photo.
This is how you will get a sharper and flat photo. Sometimes, adjusting the shadow and highlight also can do the job. All you have to do is to make the photo natural. When you give the natural brightness and contrast, you will see the difference in your image.
Use a healing brush to remove unwanted spots:
This is another very important tip for having a perfect photo. Especially when you are working with a close shot or detailed image, you may find some difficulties with unwanted spots. If you can able to remove those spots, you will get a perfect photo.
To remove the unwanted spots and scars from the photo, you can use the healing brush. Almost every photo retouching software has these features. While using a healing brush, you can start with a smaller part of the photo because it’ll help you get a more detailed and flawless picture.
Use the clone stamp tool:
If you want a clear and original skin tone, the clone stamp tool is the best tool for you. Sometimes, while adjusting the skin tone, the photo may lose some pixels. As a result, there is a possibility to get a lower grade image. In that case, you can simply use the clone stamp tool.
This is a very useful tool for creating an alternative duplicate. And it becomes much easier for you to compare with the original photo and get a natural tone for your image. Also, sometimes, using different bending modes of the clone stamp tool can ruin your whole edited photo.
Use the burn tool:
Before using the burn tool, you need to understand what is the role of the burn tool. Usually, the burn tool will help you to get natural light according to the image requirement. When you work with the burn tool, you will see a curve adjustment layer.
And this curve adjustment layer is a very effective tool for adjusting the lights and color tone. But If you are working with a larger image, it may take a bit longer to adjust the color tone. But by that curve adjustment layer, you can easily adjust the shadow and the highlight of the photo.
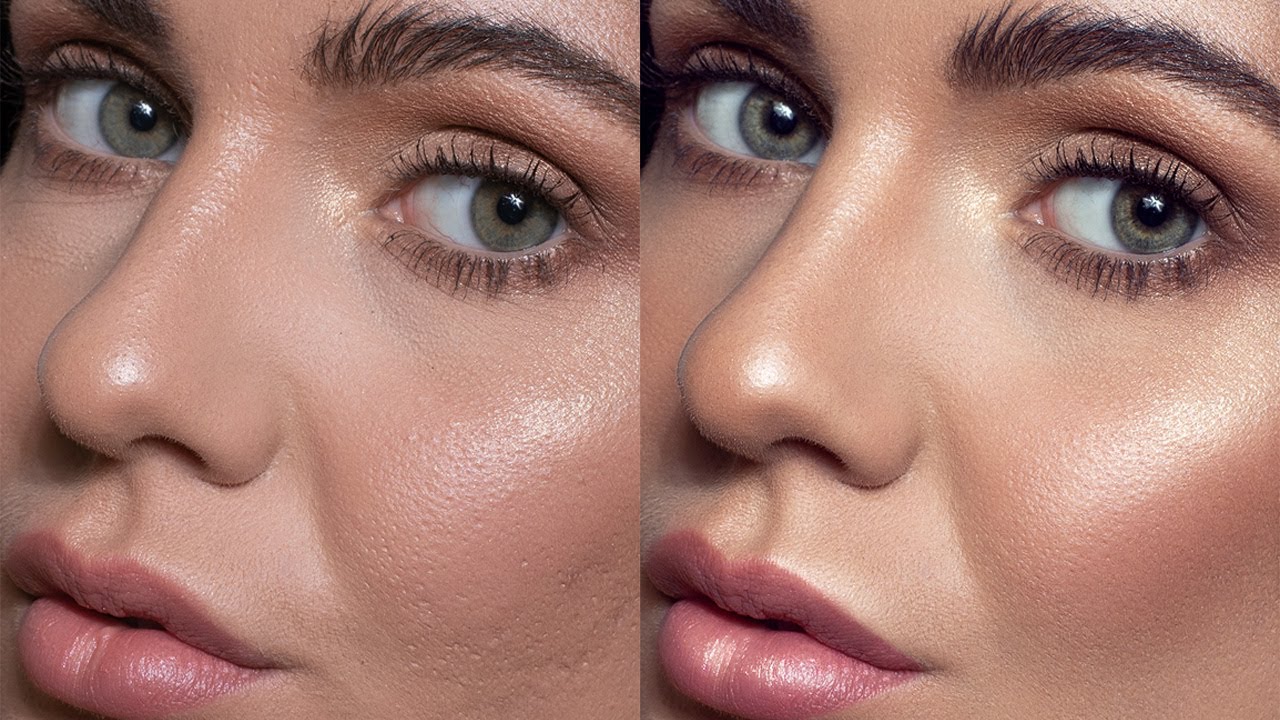
Use Frequency separation:
Sometimes, when a photo has high-frequency pixels, you may need to adjust or level it. This feature will help you to make that adjustment. You can easily create a smoother photo by using this. It will also help you to separate the higher pixels from the lower pixels.
As a result, if there are any wrinkles in the skin of the photo, you can make it clearer and smoother. Not just only the skin, you can also modify the background, skies, clothes, and many more. So, this feature is very useful for retouching a photo.
Change the layer of the photo:
Usually, professional editors try to change the layer of the photo to get a perfect picture. Firstly, they change the original image to the B&W layer, which helps them understand the lighting of the photo. If the photo has too much contrast, you can put the opacity to 20-50%.
This will make the photo more detailed and sharper. Thus, you can also adjust the photo’s colour balance – for example, adjusting the photo’s hue, Saturation, the color of the photo, and many more. Changing the layer and adjusting the color will make the image more realistic and cool.
Conclusion:
Fine-tuning a photo and making it perfect can be fascinating and cool. But you need to know how to use all those tools properly. The techniques mentioned above are just some basic tips and tricks for photo retouching. But these days, you will find many online photo editing services that can help you in this regard.
There are plenty of photo editing service providers out there. You need to find the perfect one for you as per your criteria. You can also get a photo retouching services from professionals. Hopefully, this writing helped you to know some useful photo retouching tips and tricks.
Lucas Noah, armed with a Bachelor’s degree in Information & Technology, stands as a prominent figure in the realm of tech journalism. Currently holding the position of Senior Admin, Lucas contributes his expertise to two esteemed companies: OceanaExpress LLC and CreativeOutrank LLC. His... Read more